


This lesson describes how an OpenBAT can be configured as AP using its own radius server and providing an EAP-TLS connection for a Windows 7 client and how to create certificates for this use with XCA.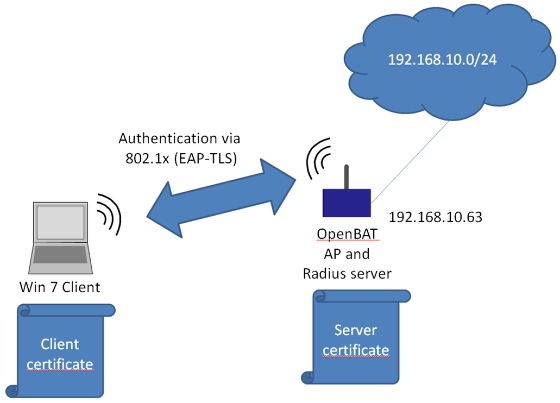
This is the network which will be configured in this Howto.
This configuration and this topology is an example only. It can be modified according to customers needs.-
Configure OpenBAT
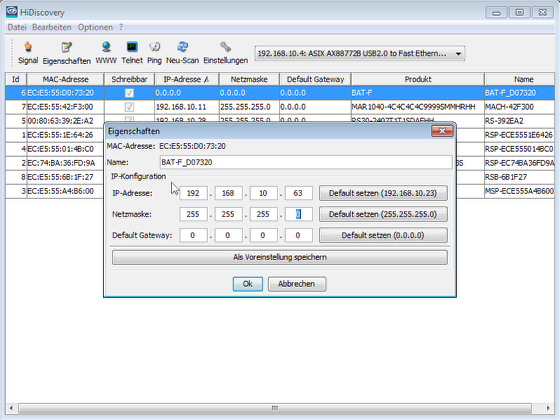
Use HiDiscovery to assign a IP-address to the BAT. The PC is locally connected.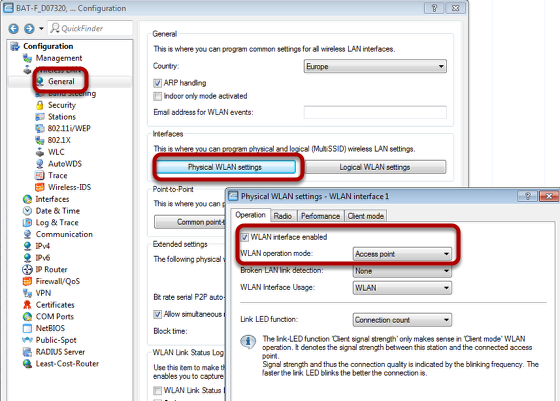
Use Access-Point as WLAN operation mode. Optionally you can choose alternative Radio settings etc.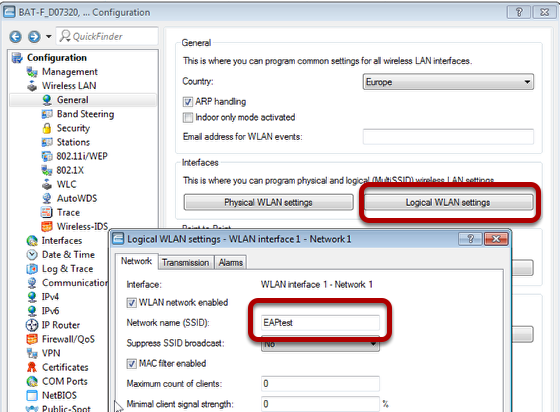
Configure the SSID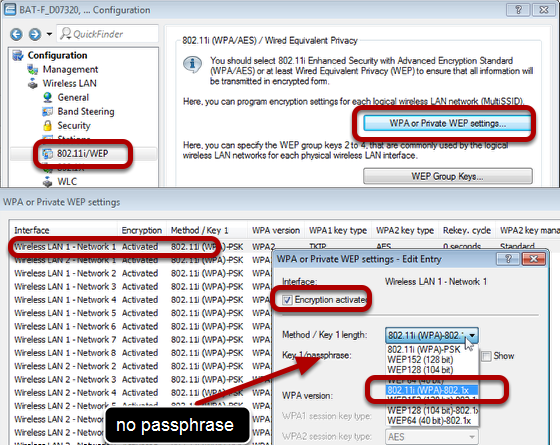
Proceed to menu "Wireless LAN - 802.11i/WEP"
Use button "WPA or Private WEP settings...". A new window will open
Doubleclick on first line
Make sure that "encryption activated" is checked
Choose "802.11i (WPA)-802.1x" as "Method
Leave the passphrase field blank.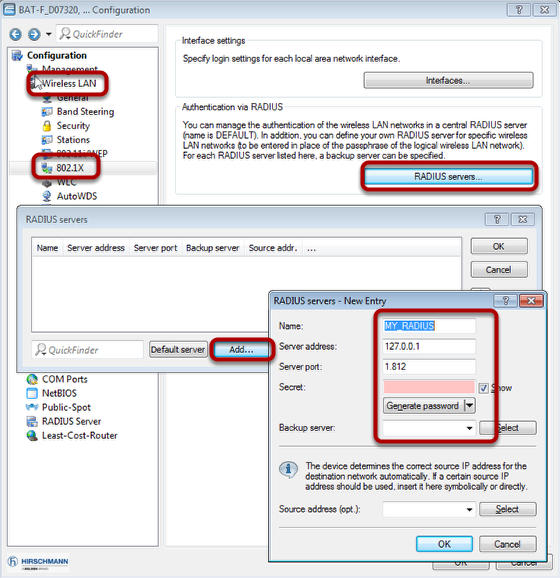
Proceed to menu "Wireless LAN - 802.1X"
Use button "RADIUS servers...". A new window will open.
Use button "Add". A new window will open.
Fill in the fields. Leave the "Secret" field blank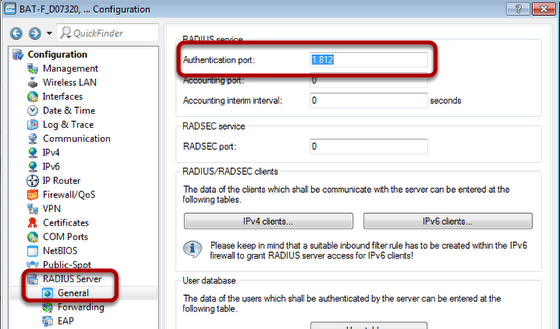
Proceed to menu "RADIUS Server - General"
Use "1812" as "Authentication port".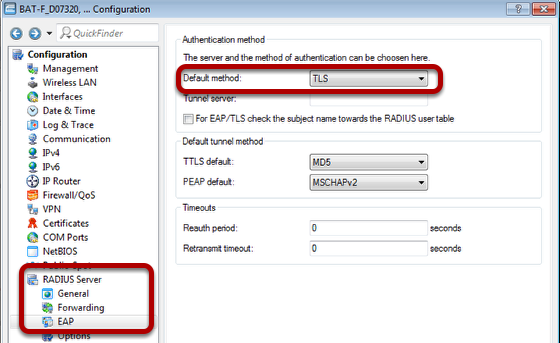
Proceed to menu "RADIUS Server - EAP"
Choose "TLS" as "Default method".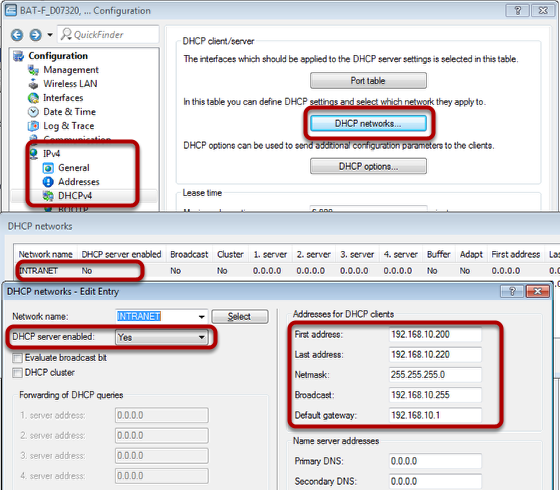
Proceed to menu "IPv4 - DHCPv4"
Use button "DHCP networks...". A new window will open.
Doubleclick on the first line (INTRANET). A new window will open.
Enable DHCL server and configure relevant IP settings.
Now the configuration of the OpenBAT is finished.
Upload Server Certificate to OpenBAT
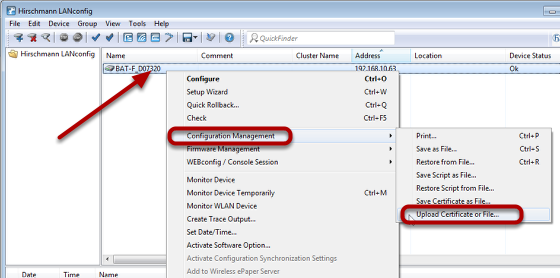
Rightclick on the OpenBAT within LANconfig
Use menu "Configuration Management - Upload Certificate or File...". A new window will open.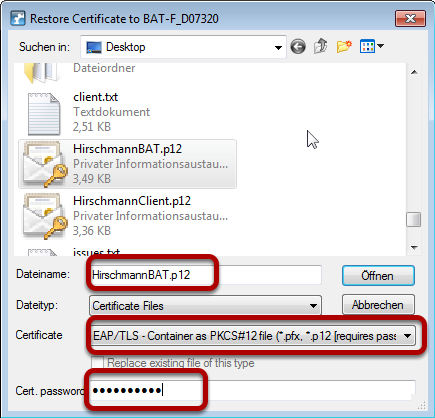
Choose the relevant file
Choose "EAP/TLS - Container as PKCS#12 file"
Enter the password
The certificate will be uploaded.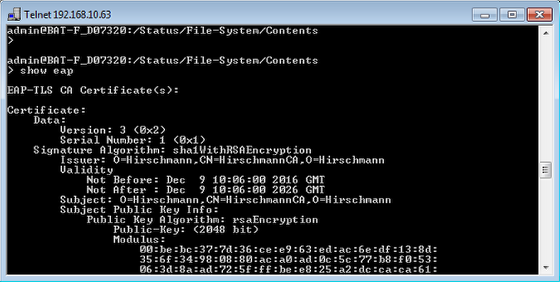
With the command "show eap" you can check that the certificate was uploaded properly.
Client side: Install the certificates
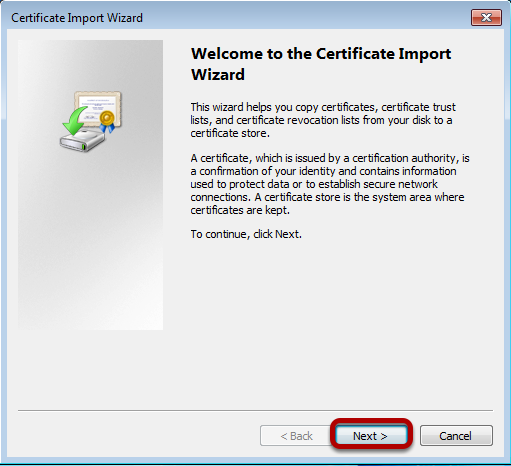
Doubleclick on the Client certificate. A new window will open.
Click on "Next"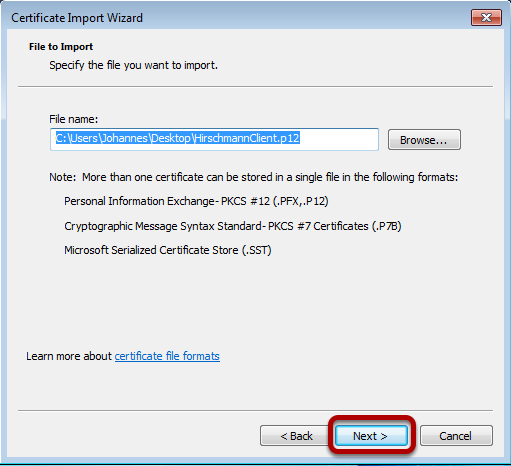
The wizard will show the path of the certificate.
Use button "Next".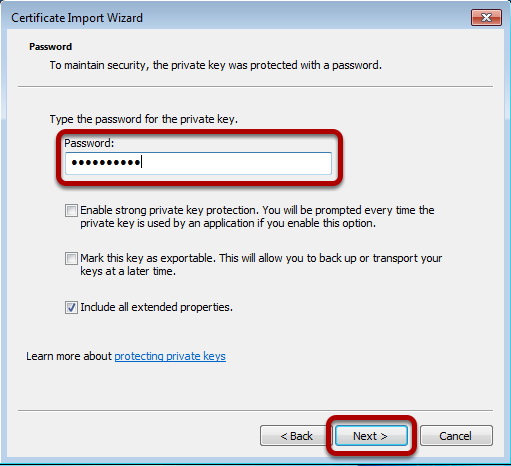
Enter the password of the certificate and click on "Next".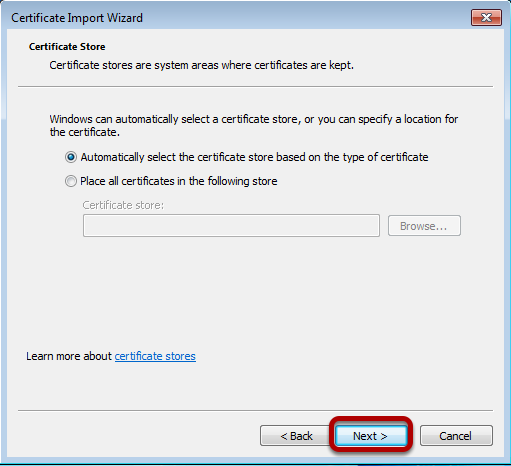
Stay with default settings. The place to store the certificate will be selected automatically.
Click on "Next".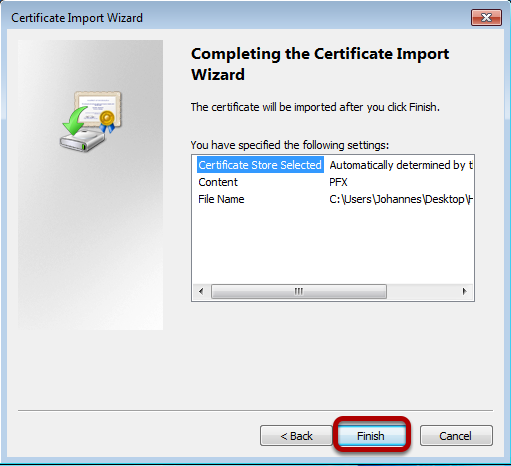
Click on "Finish".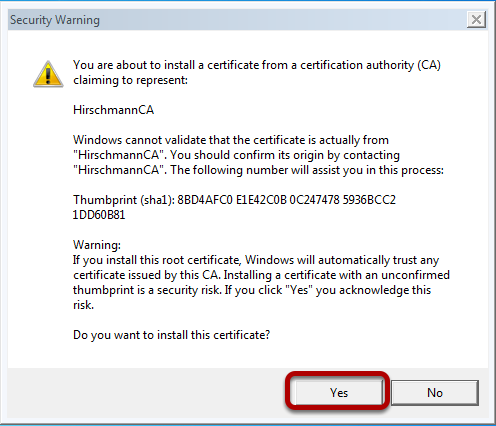
Confirm to install the certificate.
Configure the wireless network
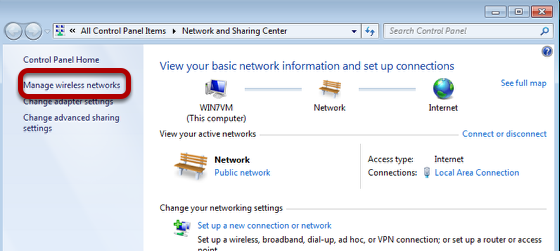
Open the window to manage Wireless networks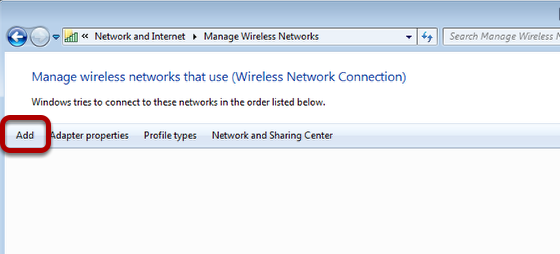
Click "Add" to create a new entry.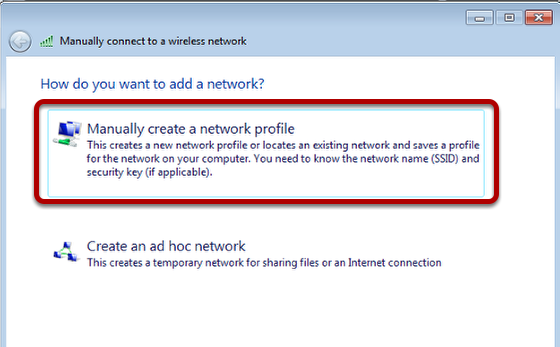
Use option "Manualle create a network profile".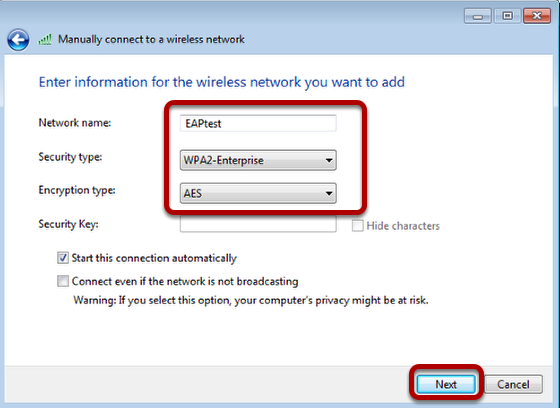
Enter the previously configured SSID
Choose WPA2-Enterprise" as "Security type" and "AES" as "Encryption Type".
Click "Next"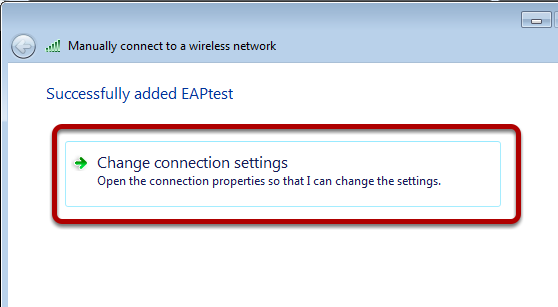
Click on "Change connection settings"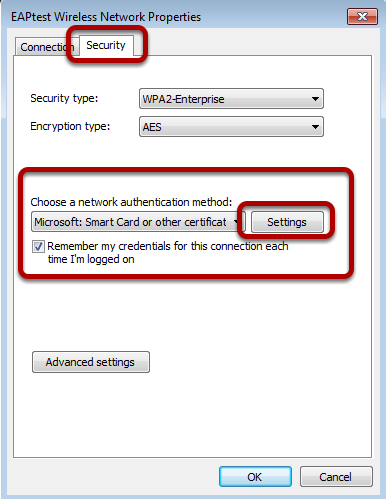
In tab "Security" choose "Microsoft Smartcard..." and press the button "Settings"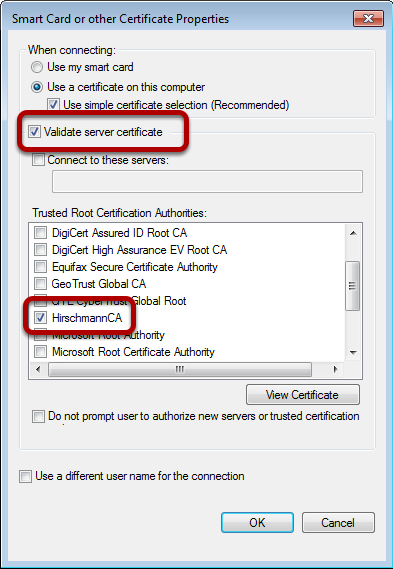
Check "Validate server certificate" and choose the relevant certificate.
Close all configuration dialaogs with button "OK"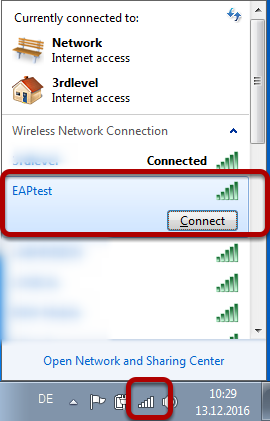
Click on the WLAN icon in the taskbar and choose the relevant WLAN (EAPtest) to connect to.
 Deutsch