


Master AP Configuration
1. When the BAT radio is connected to a network or computer it will automatically take the subnet of the network with 254 for the last octet xxx.xxx.xxx.254.
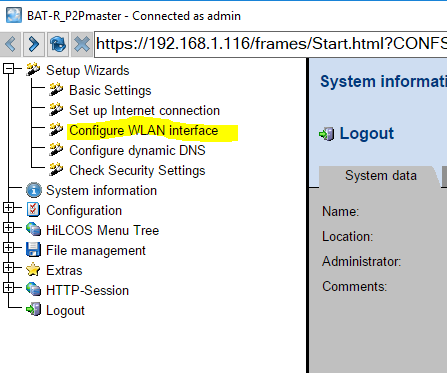
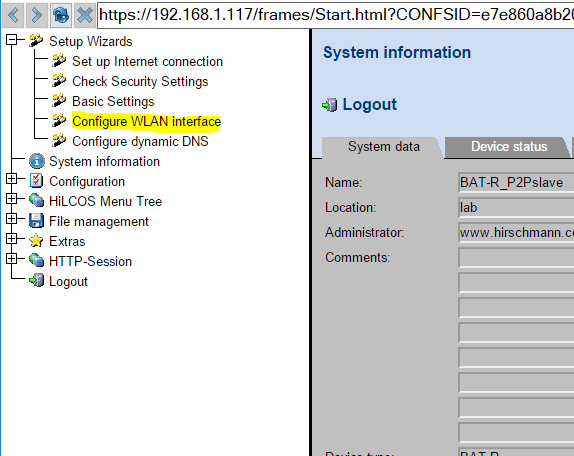
2. Login to the device GUI and go to Setup Wizards/Configure WLAN interface
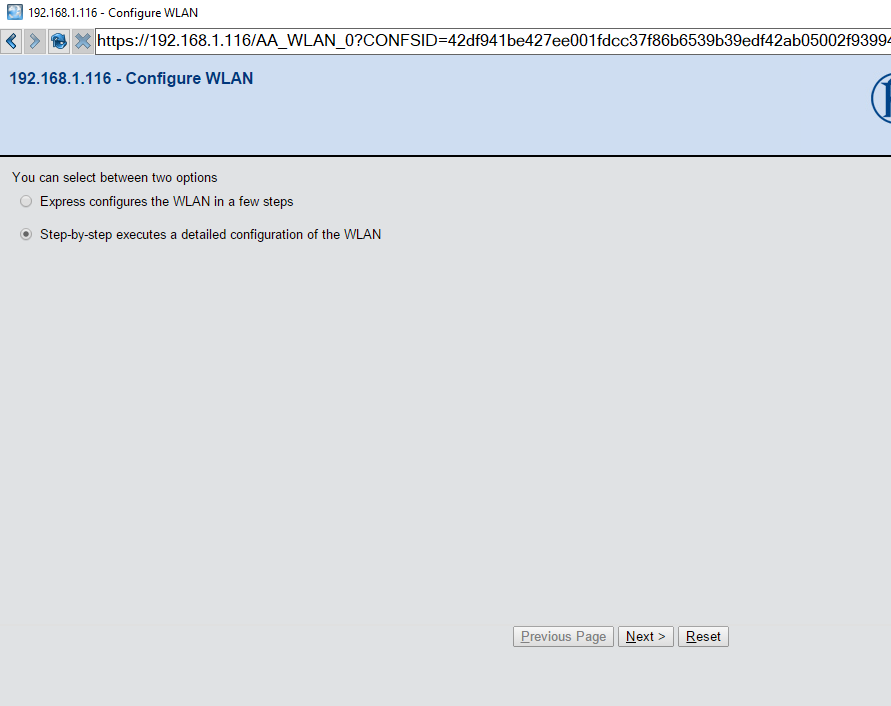
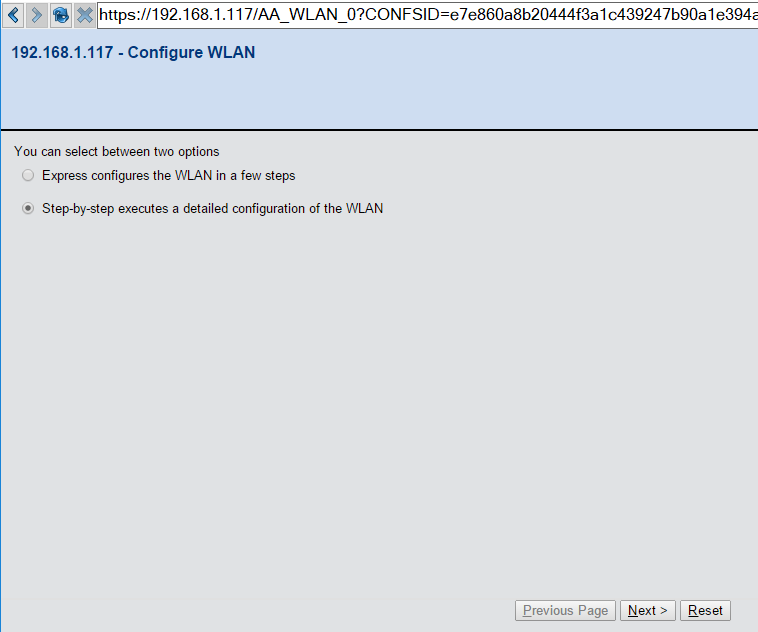
3. Choose the Step by step option and click next
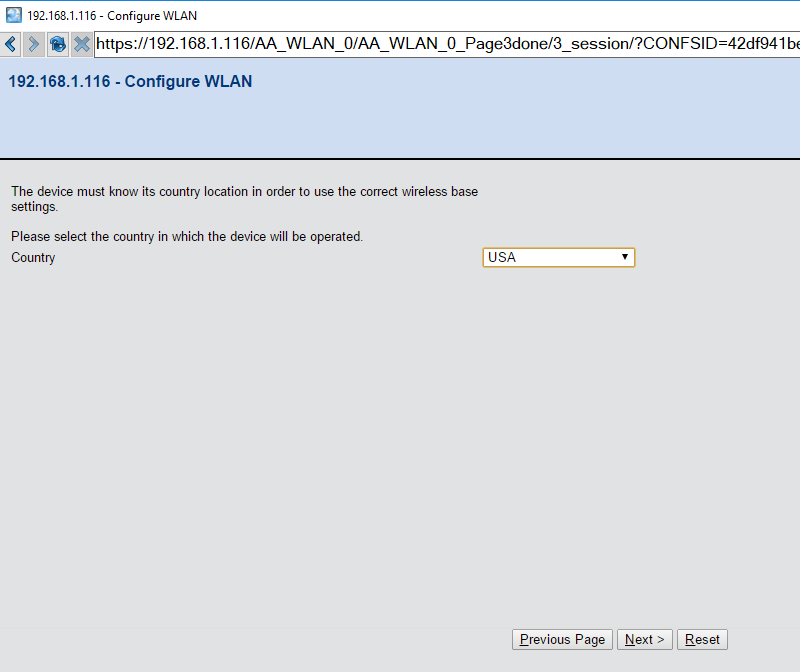
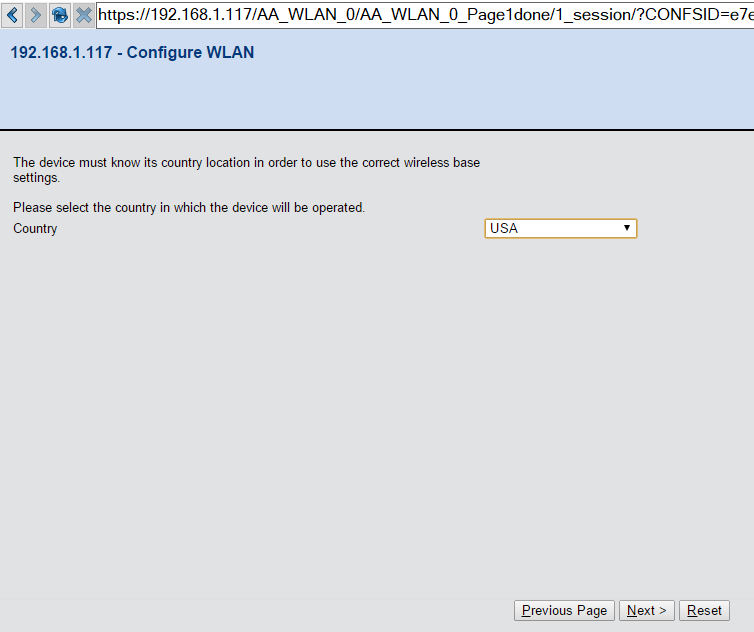
4. Choose the country code the radio will be located in and click next
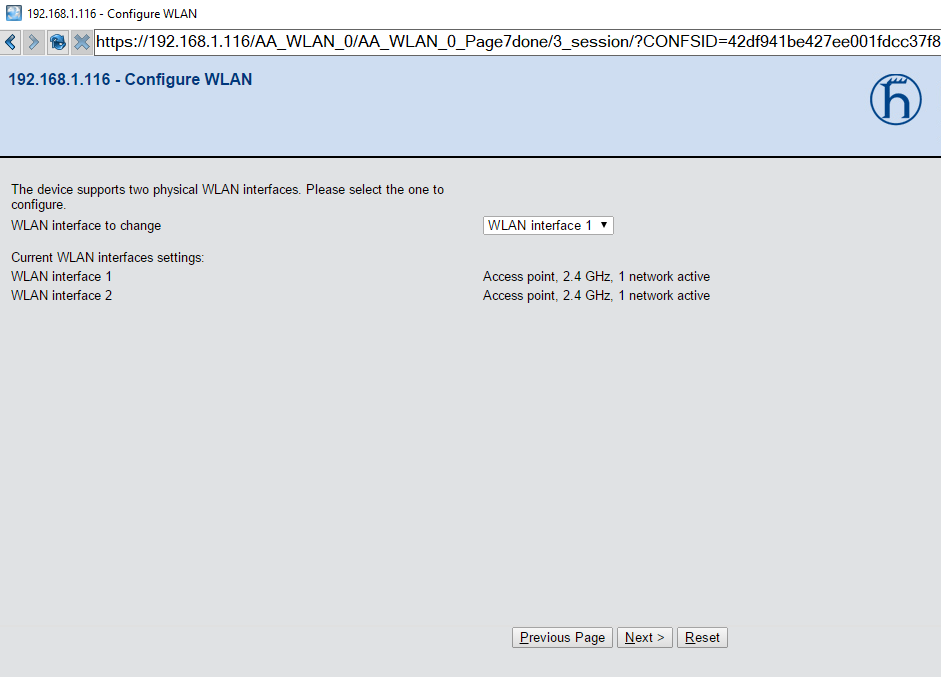
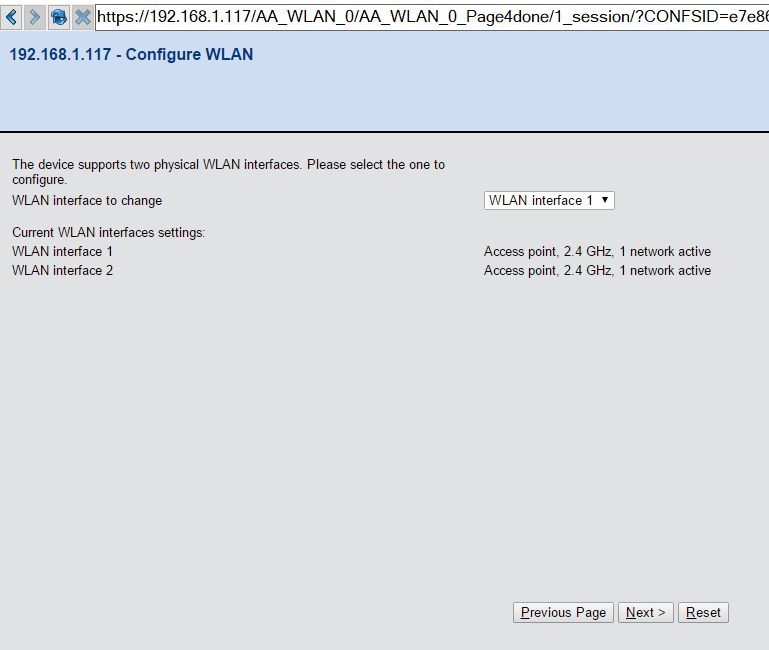
5. Select the WLAN interface and click next
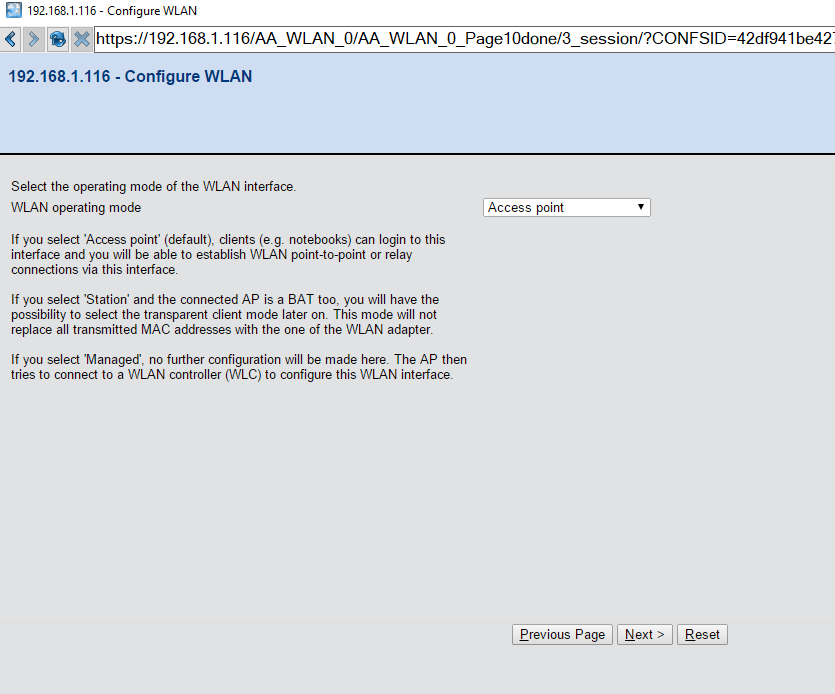
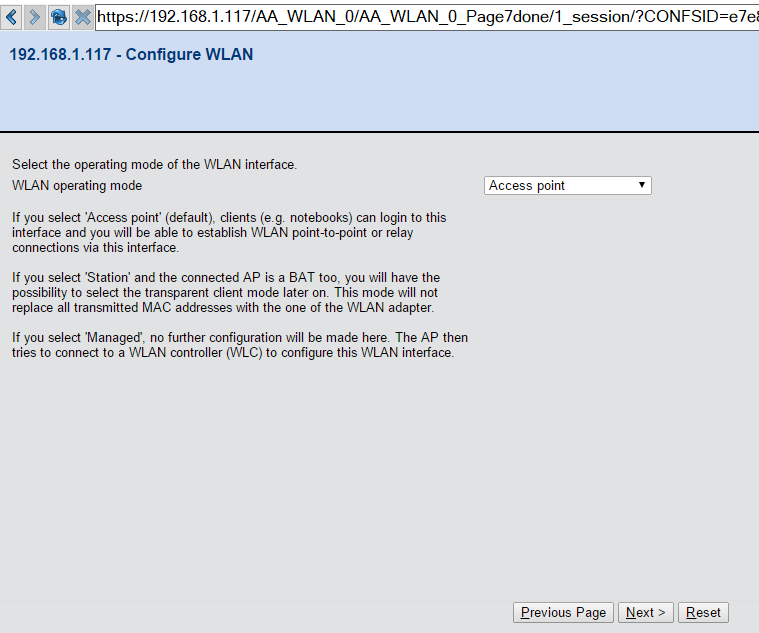
6. Choose the Access point mode and click next
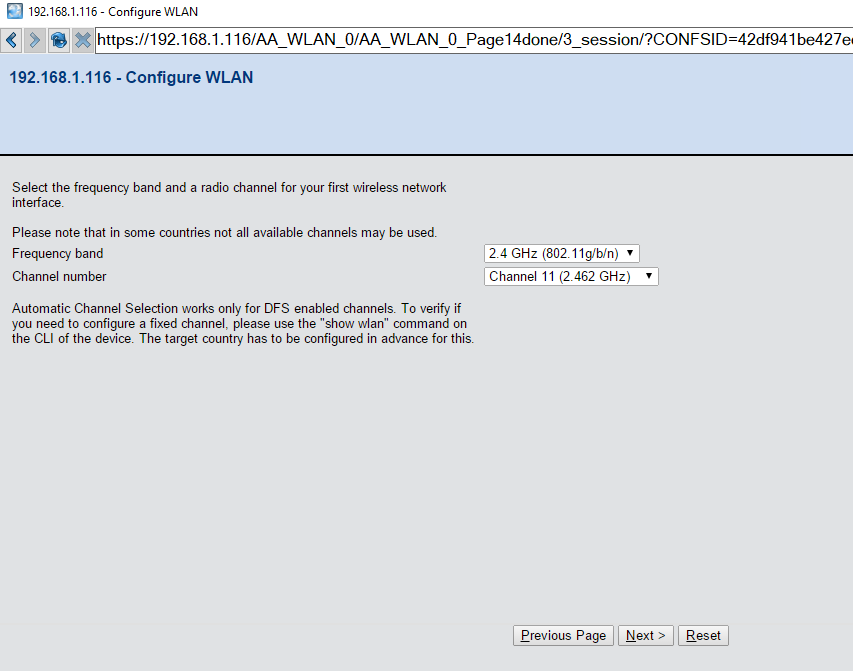
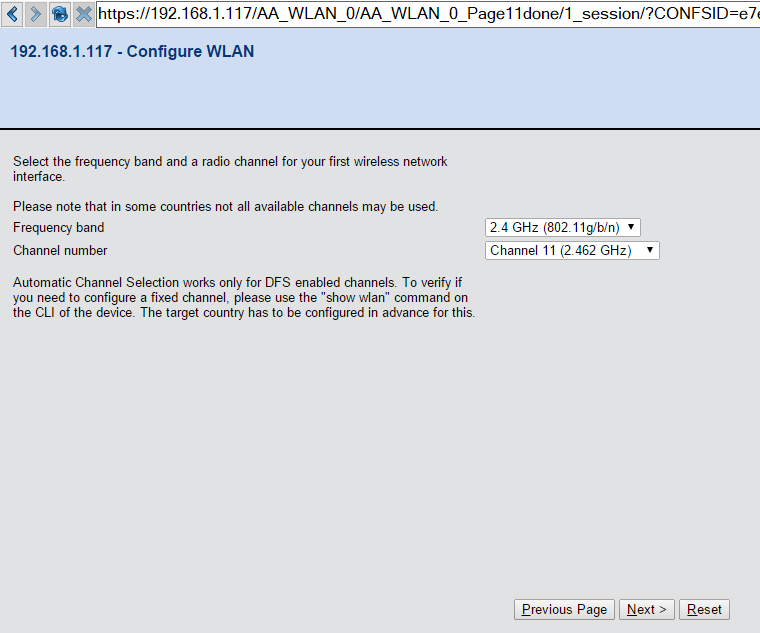
7. Select the frequency and channel for the radio and click next
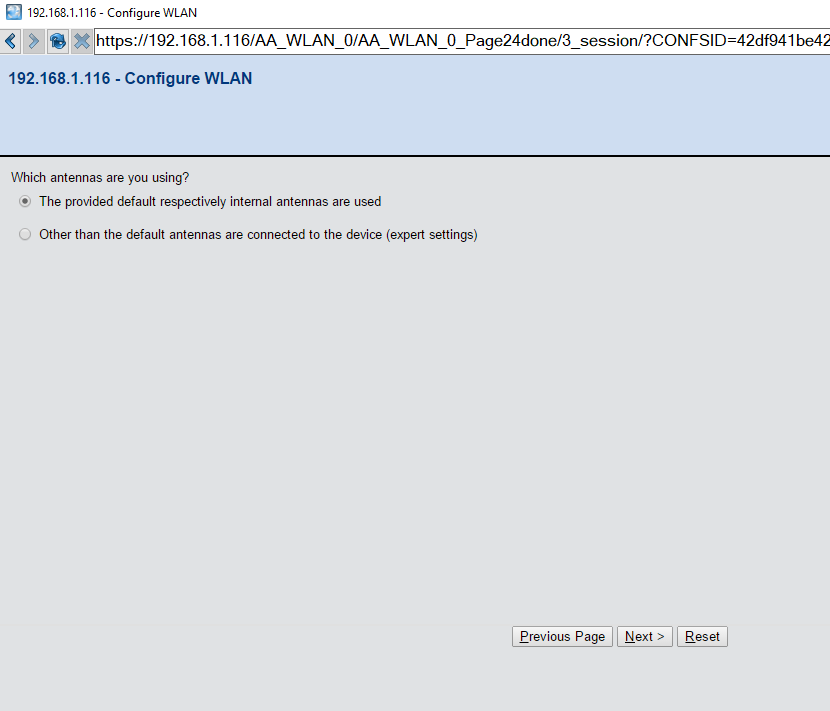
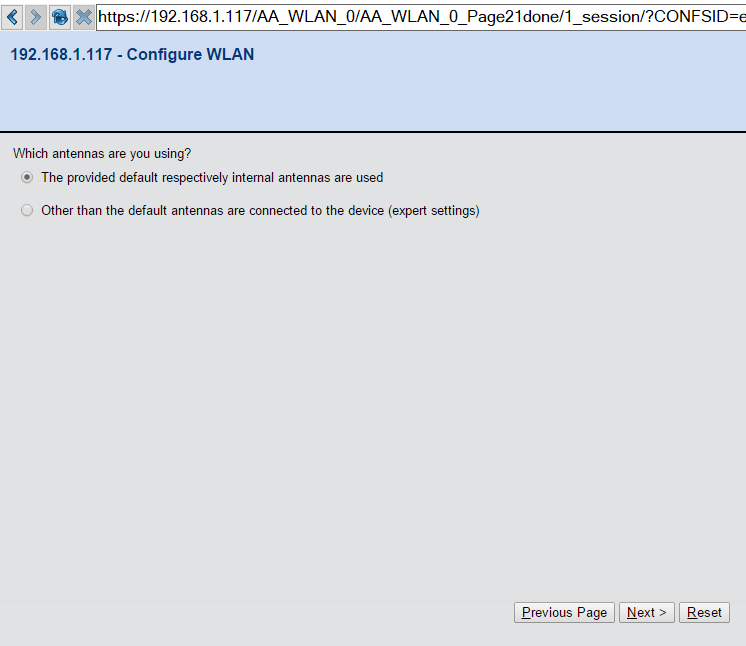
8. For link test select the internal antenna option and next. Note: if using a high gain antenna the radio may need to be attenuated per FCC standards
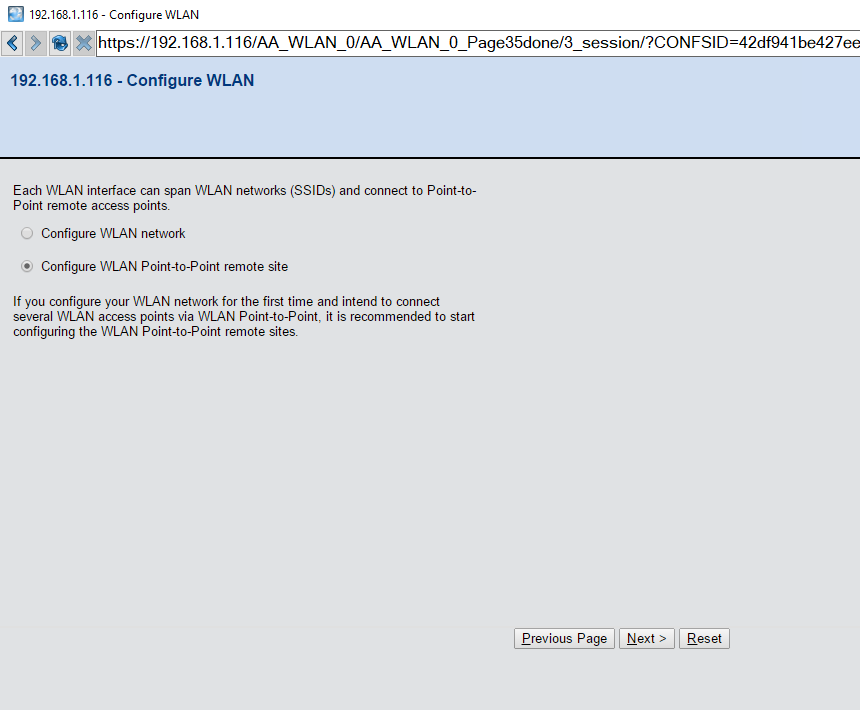
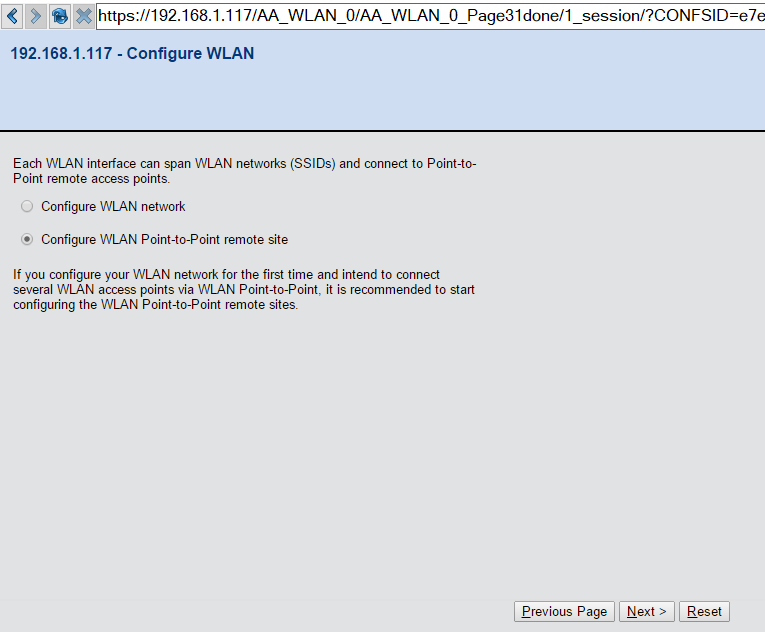
9. Select configure WLAN point to point and click next
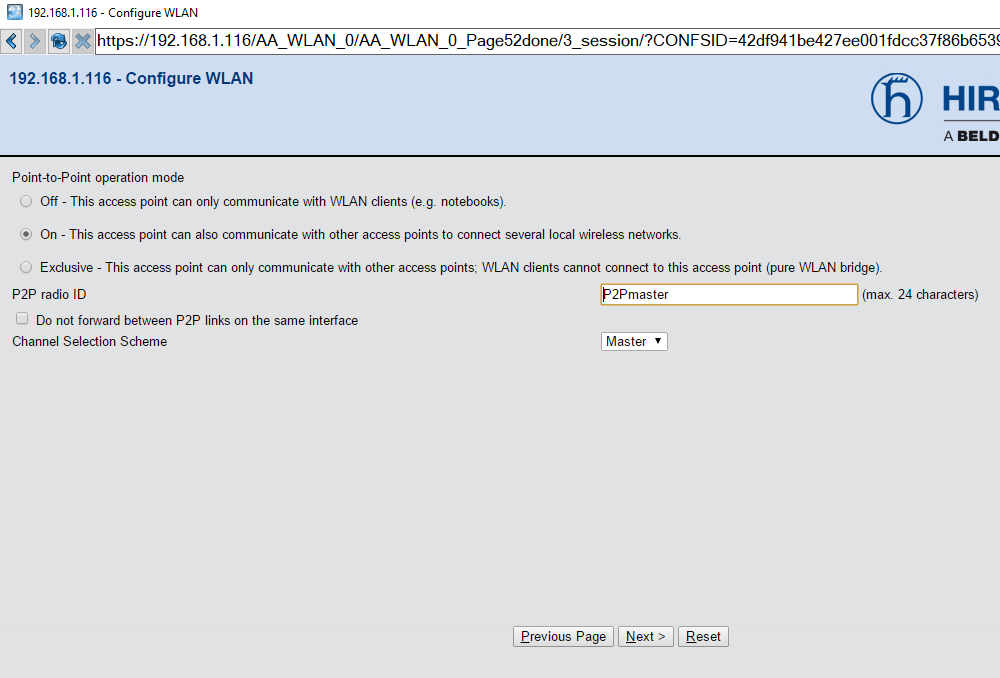
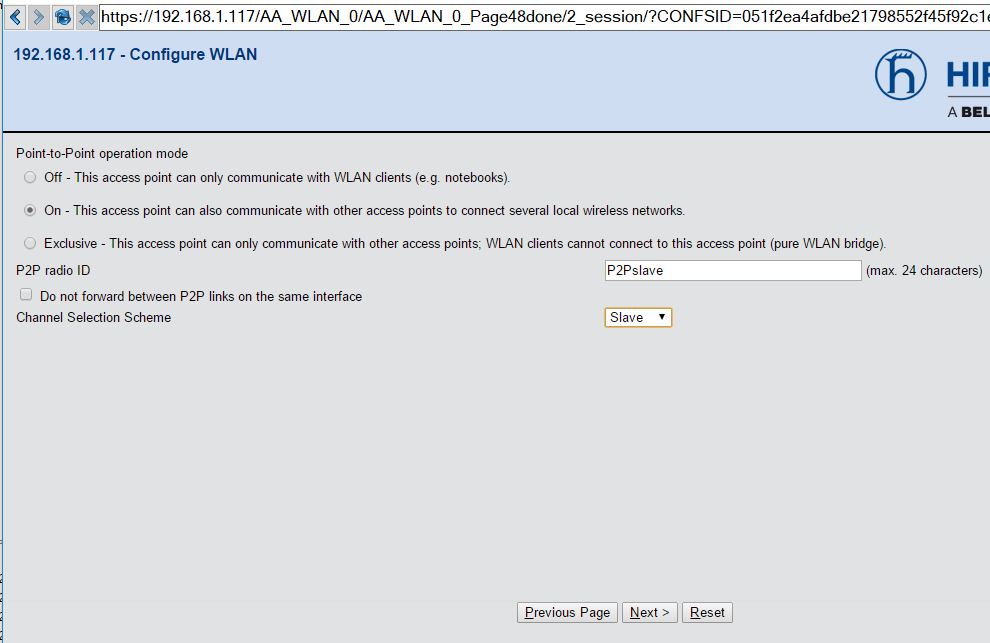
10. If the network only Hirschmann devices with point to point links select exclusive, if the network has client devices connecting to the Aps select On, then specify the P2P radio ID, select Master for the channel selection scheme and click next
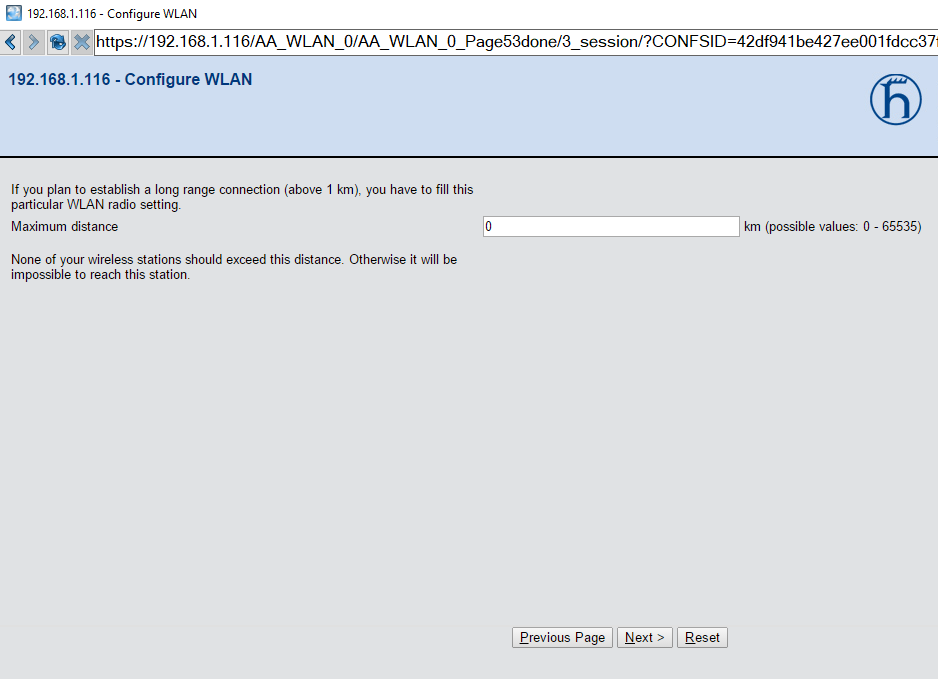
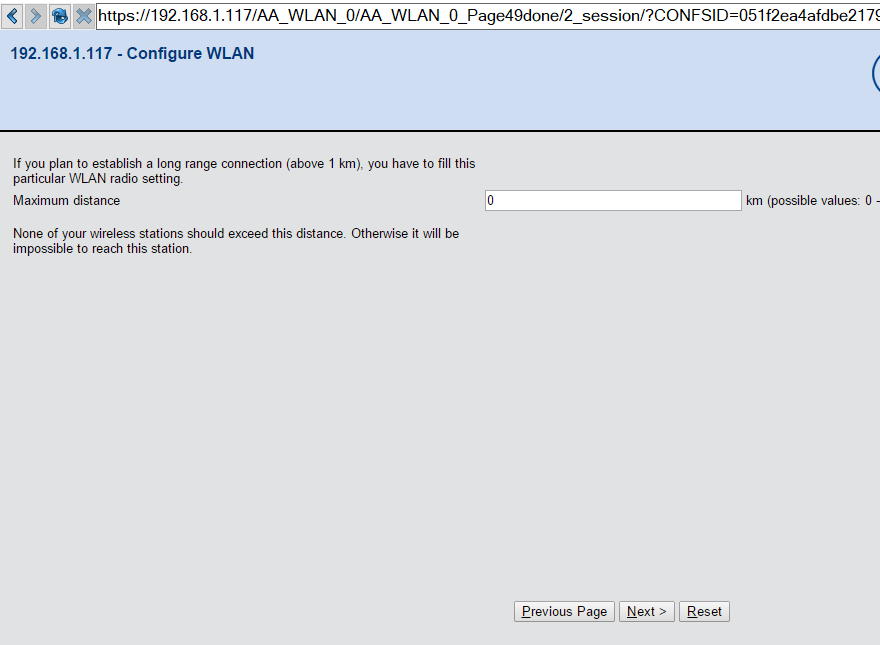
11. Put the estimated distance between radios to set the timing of the links and click next
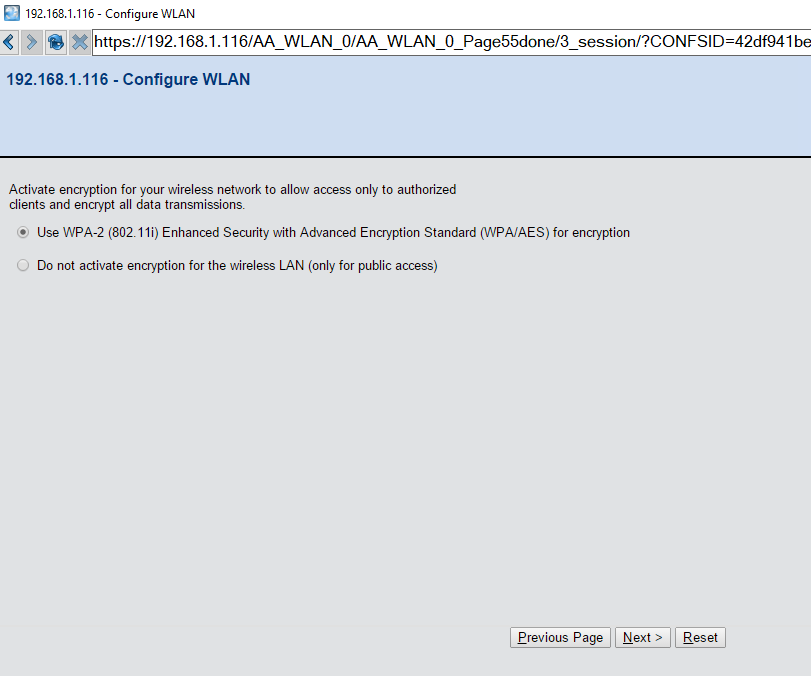
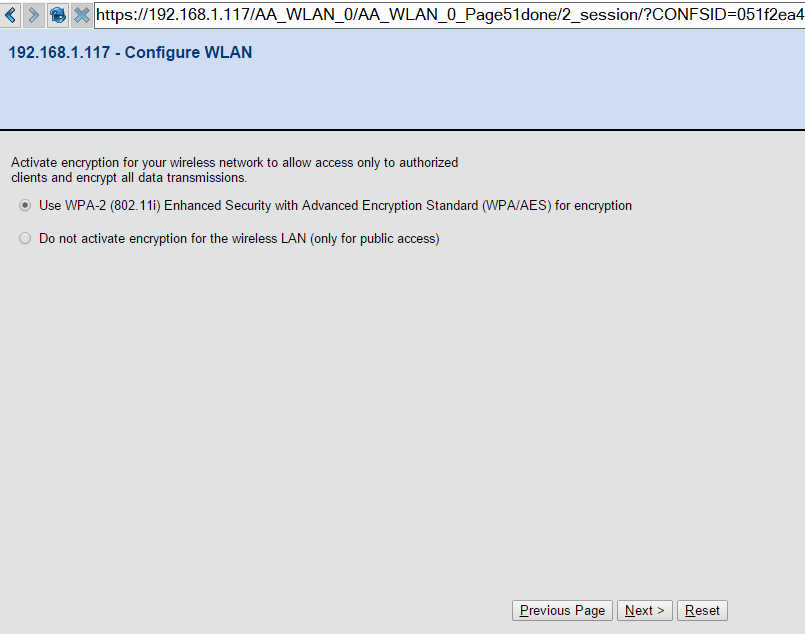
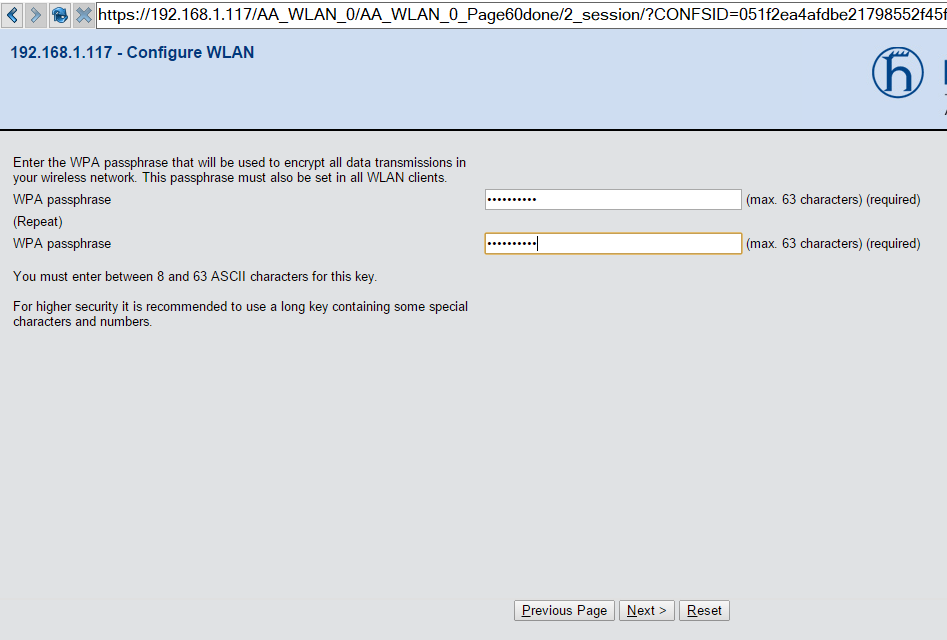
12. Choose the use WPA-2 to secure the link and click next
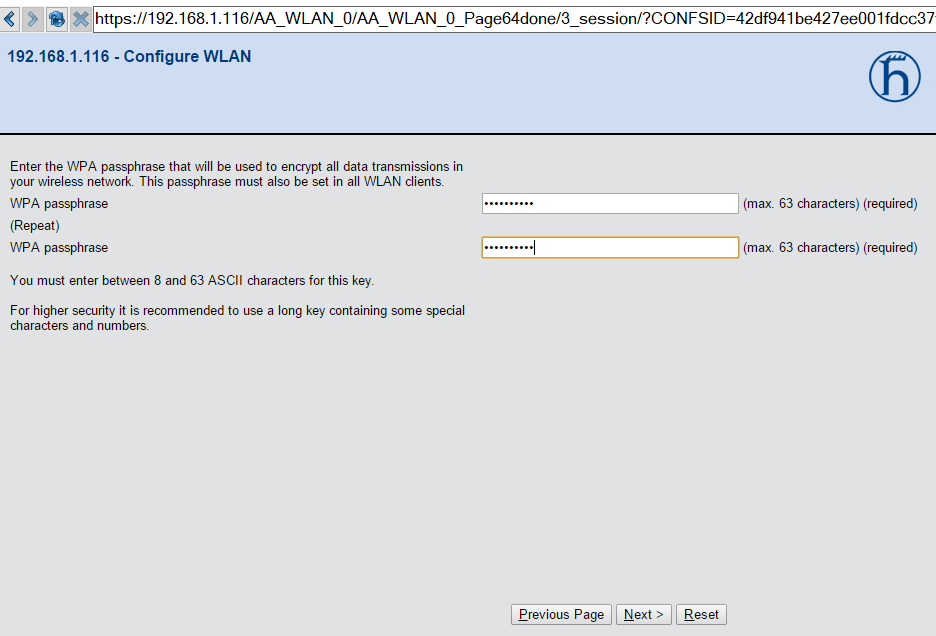
13. Type in the chosen passphrase and repeat to verify, then click next
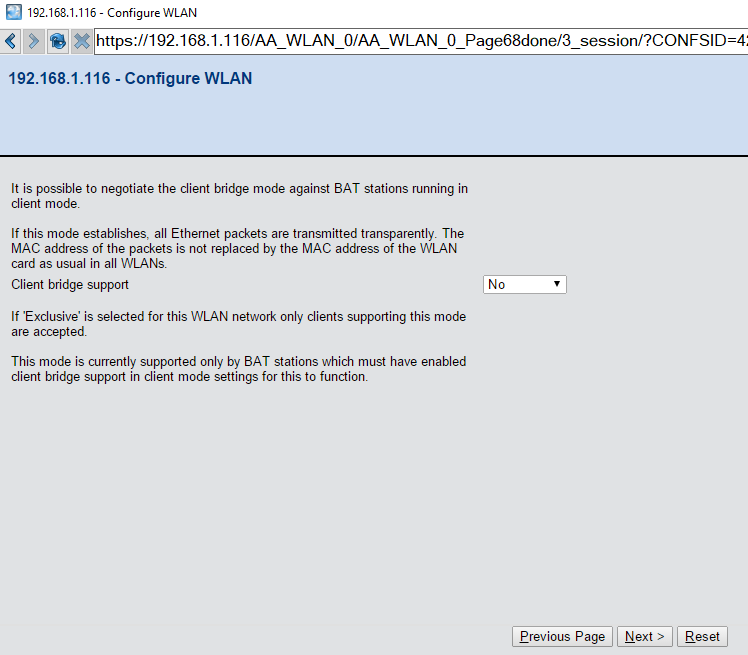
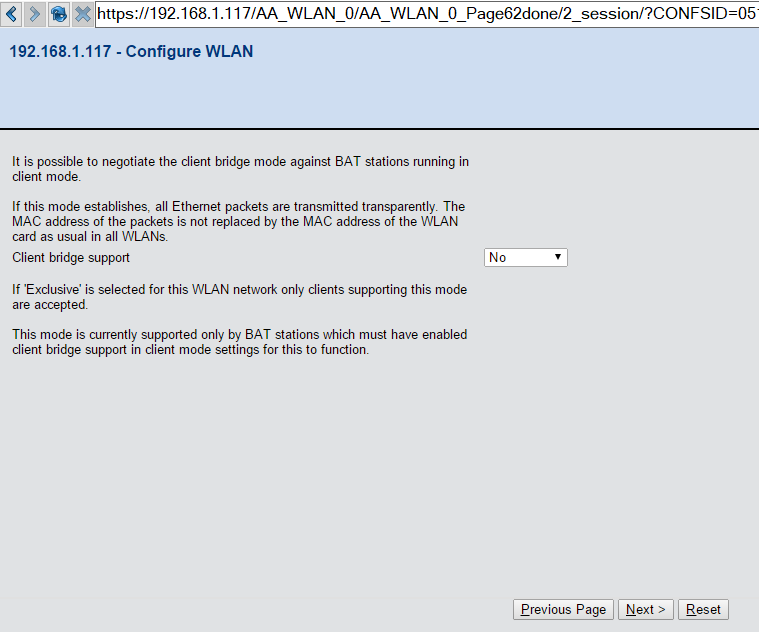
14. Choose no(default) for client bridge support and click next
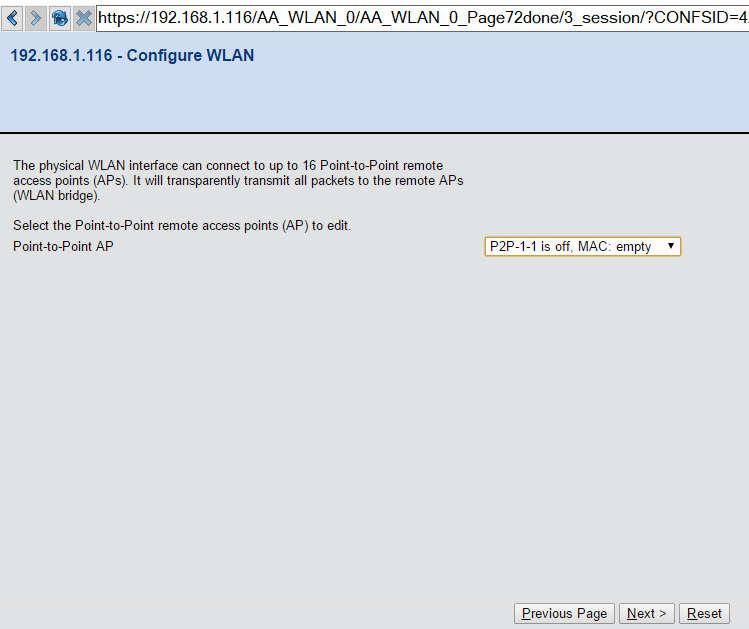
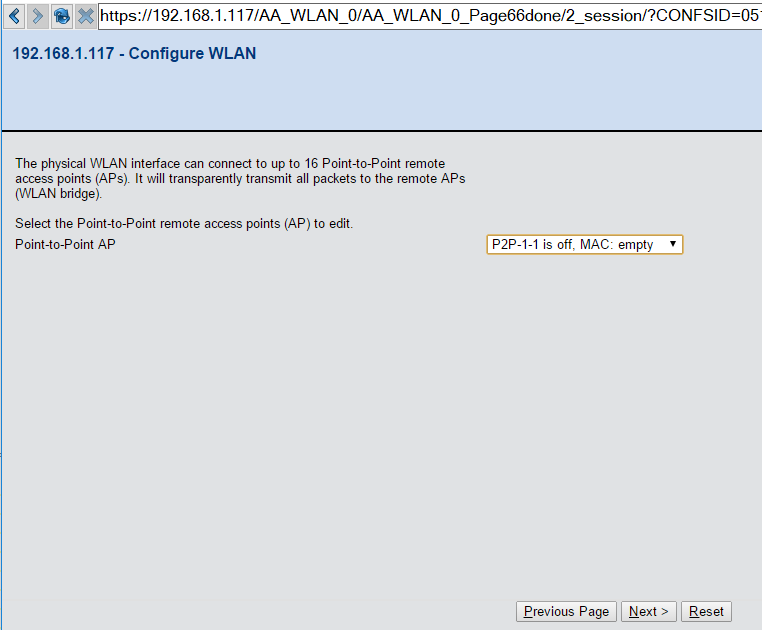
15. Choose the point to point link to edit and click next
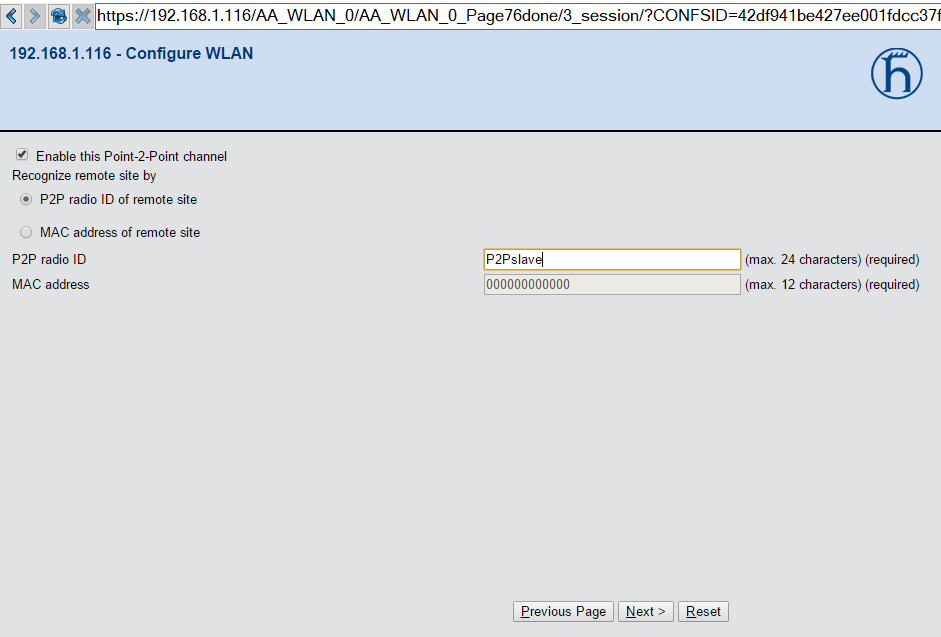
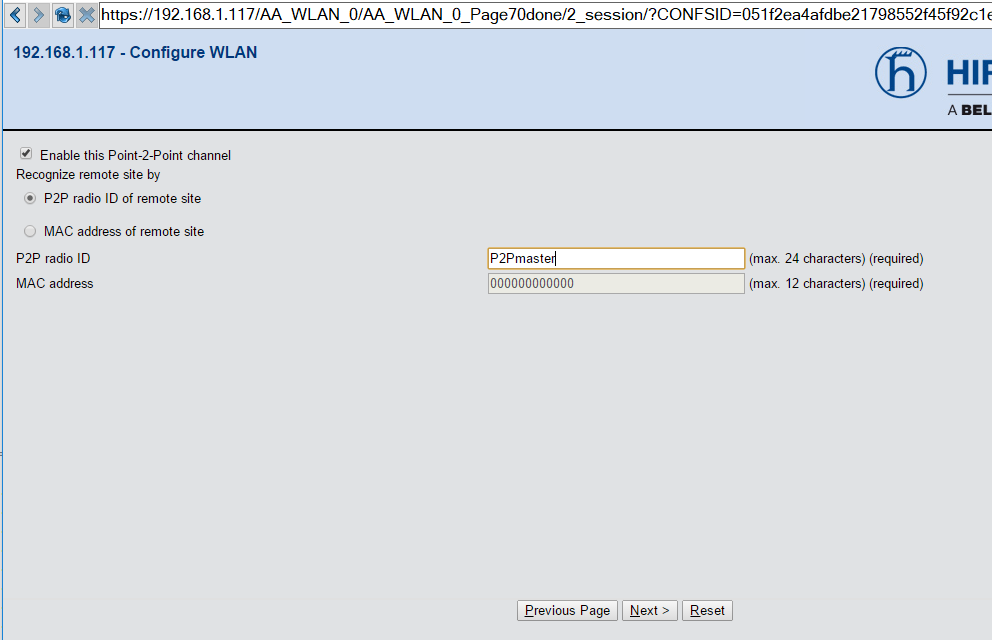
16. Enable the P2P channel, select P2P radio ID of remote site and specify the remote site radio ID, and then click next
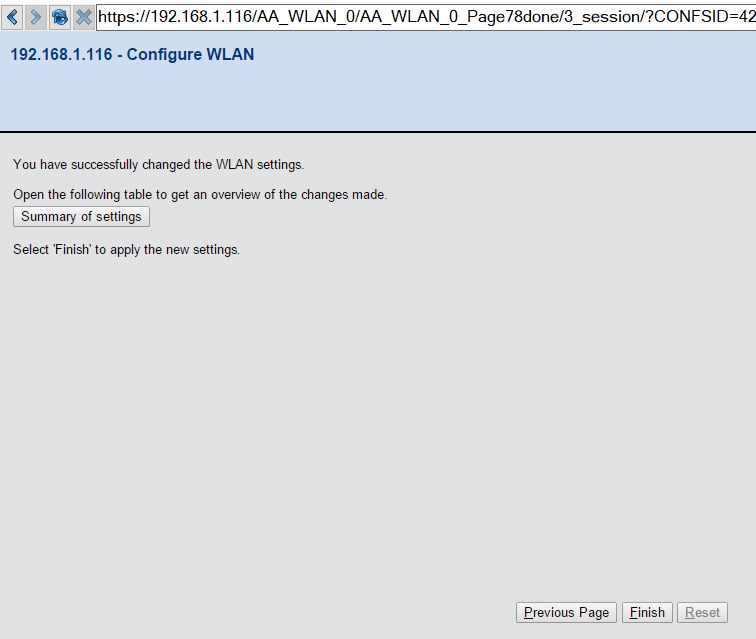
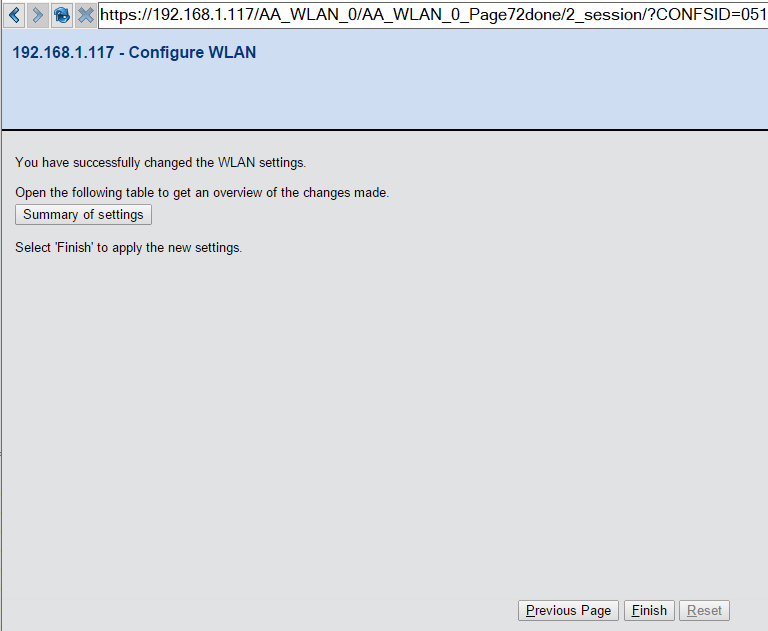
17. Click finish and the Master radio P2P link is configured
Slave AP Configuration
1. Login to the device GUI and go to Setup Wizards/Configure WLAN interface
2. Choose the Step by step option and click next
3. Choose the country code the radio will be located in and click next
4. Select the WLAN interface and click next
5. Choose the Access point mode and click next
6. Select the same frequency and channel as the master radio and click next
7. For link test select the internal antenna option and next.
8. Select configure WLAN point to point and click next
9. Select the same operation mode as the master radio, specify the radio ID (should be the same as the remote site ID in the master radio configuration), select the slave channel selection scheme and click next
10. The distance should be the same as the master configuration for timing purposes and click next
11. Choose the use WPA-2 to secure the link and click next Note:The encryption needs to be the same as the master radio or the link will not work
12. Type in the same passphrase as the Master radio, verify and click next
13. Choose no(default) for client bridge support and click next
14. Choose the point to point link to edit and click next
15. Enable the P2P channel, select P2P radio ID of remote site and specify the remote site radio ID (Master radio ID), and then click next
16. Click finish and the Slave radio P2P link is configured
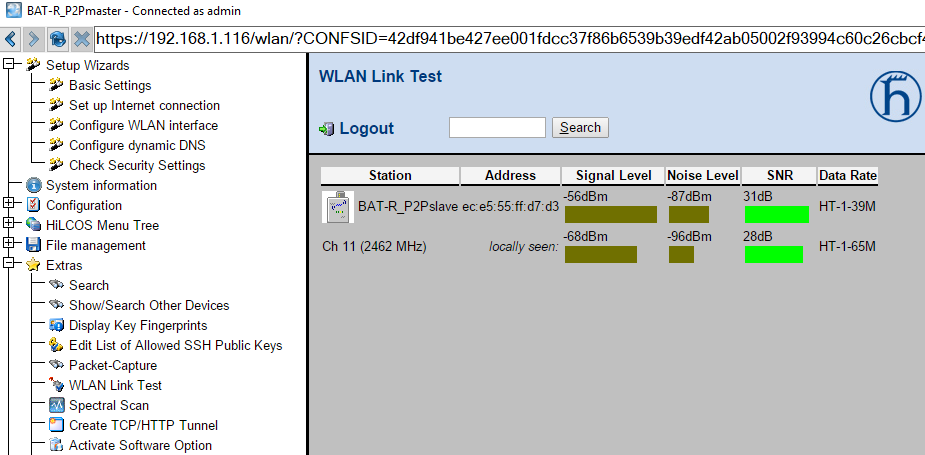
17. Verify the link is working by going to extras/WLAN link test. Here you can see the active link