


LDAP Authentication HiOS (SSL)
This lesson describes how to configure LDAP Authentication on HiOS devices.
Useful tools: LDAP browser e.g. Softerra LDAP Browser
Installation of an Active Directory Server
For the installation procedure of Windows AD Server 2012 please refer to the following knowledge base article:
For the installation procedure of Windows AD Server 2016 please refer to the following article:
Instructions how to setup the Microsoft AD Certificate Service can you find here:
https://www.virtuallyboring.com/setup-microsoft-active-directory-certificate-services-ad-cs/
Browse LDAP Server
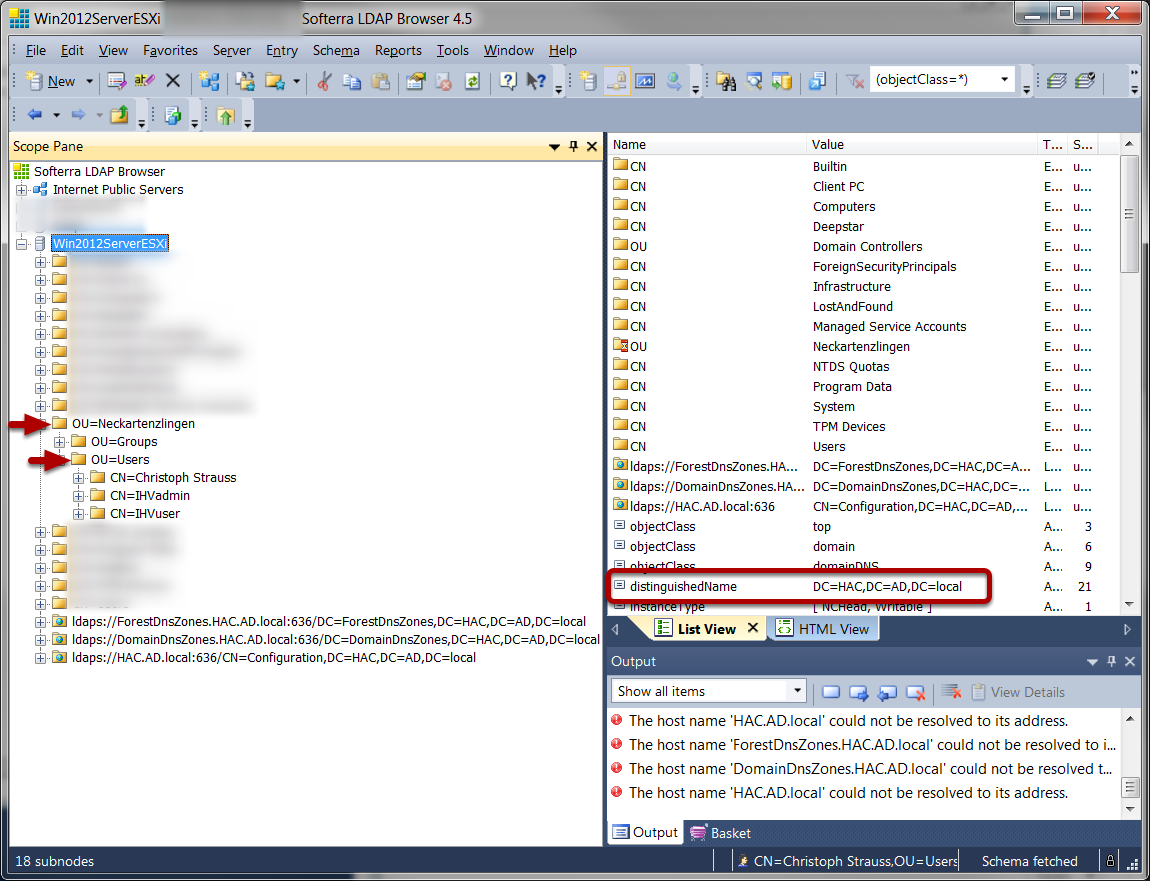
Use a LDAP Browser and browse the structure of your AD server.
Retrieve the Active Directory CA certificate from server
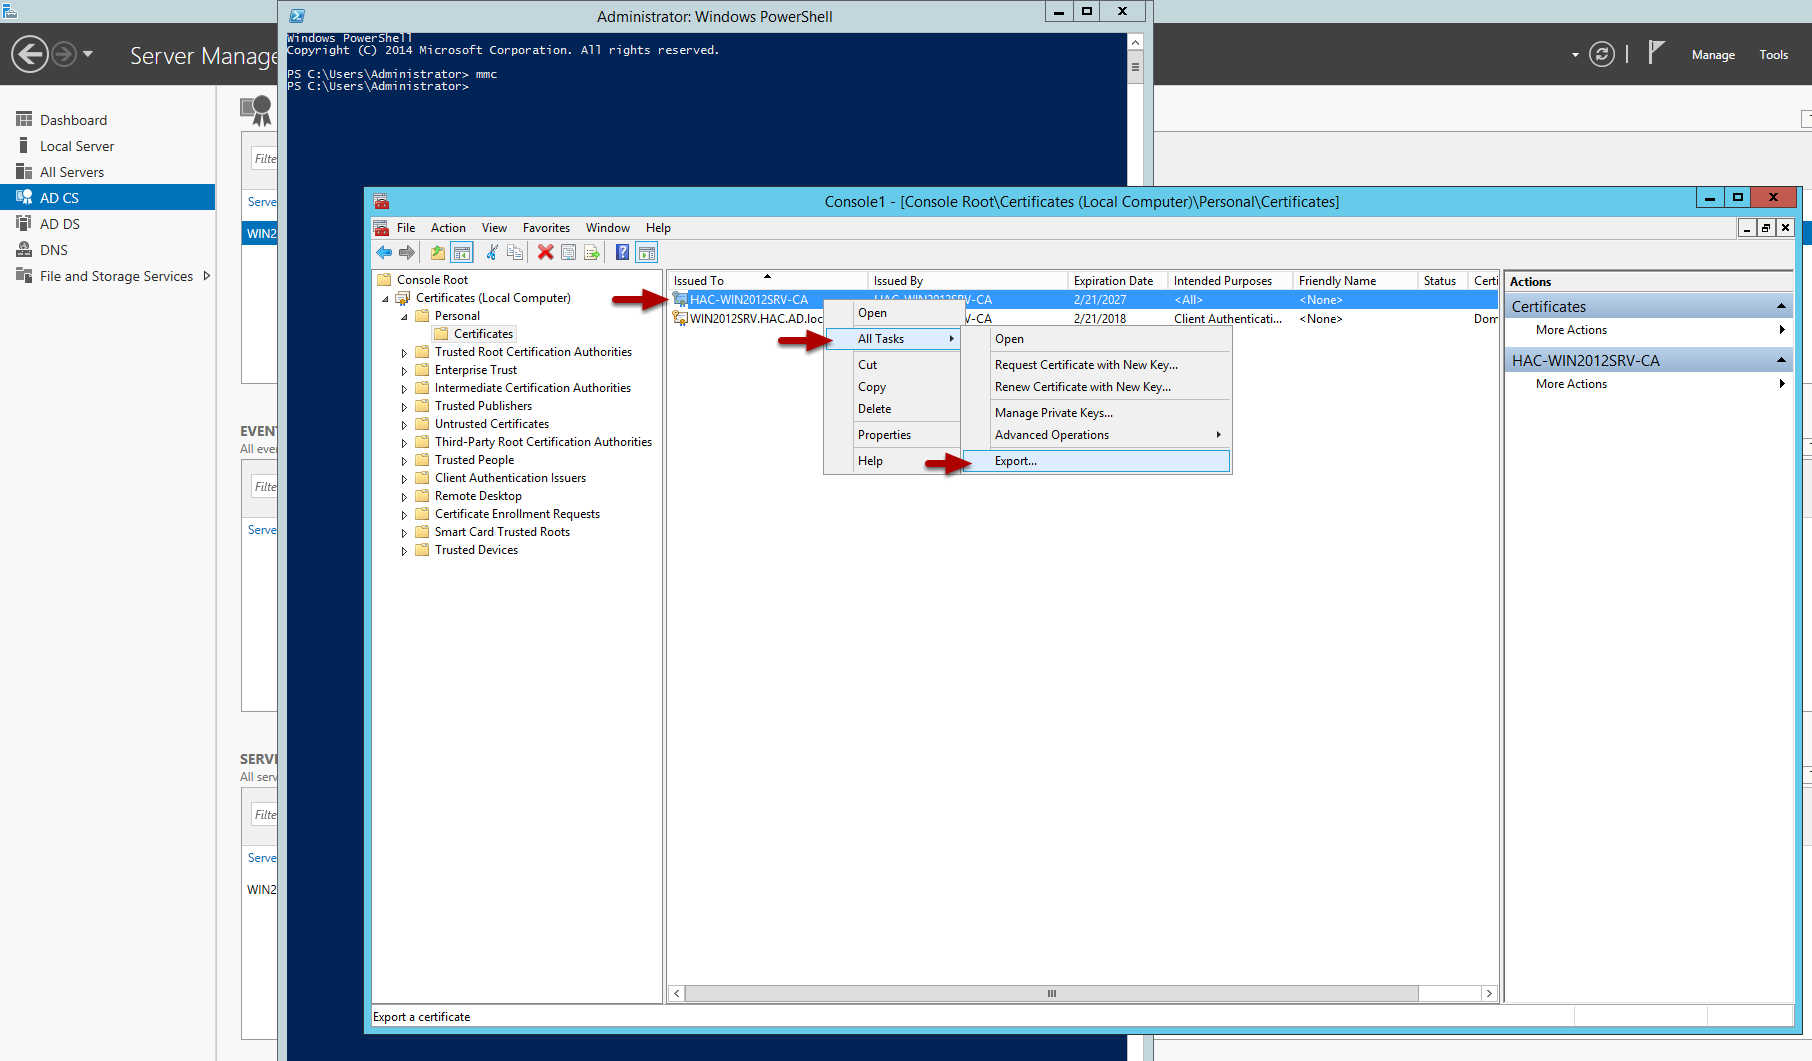
1. Make a remote desktop connection or log onto the console of a DC.
2. Via powershell, launch the Microsoft Management Console by typing MMC and pressing enter
3. From the FILE menu choose ADD/REMOVE SNAP-IN
4. Choose CERTIFICATES and click the ADD button
5. Choose COMPUTER ACCOUNT
6. Choose LOCAL COMPUTER
7. Click FINISH
8. Click OK
9. Expand the CERTIFICATES
10. Expand PERSONAL
11. Select the DC in the RIGHT WINDOW PANE
12. Right Click on the DC
13. Choose ALL TASKS - EXPORT
14. Click NEXT (2 times)
15. Select Base-64 encoded X.509 (.CER) and click NEXT
15. Name the certificate file (will be on the DC)
16. Copy the file and import it when needed
Retrieve the Active Directory CA certificate from a Client
To retrieve the AD server certificate from a client device:
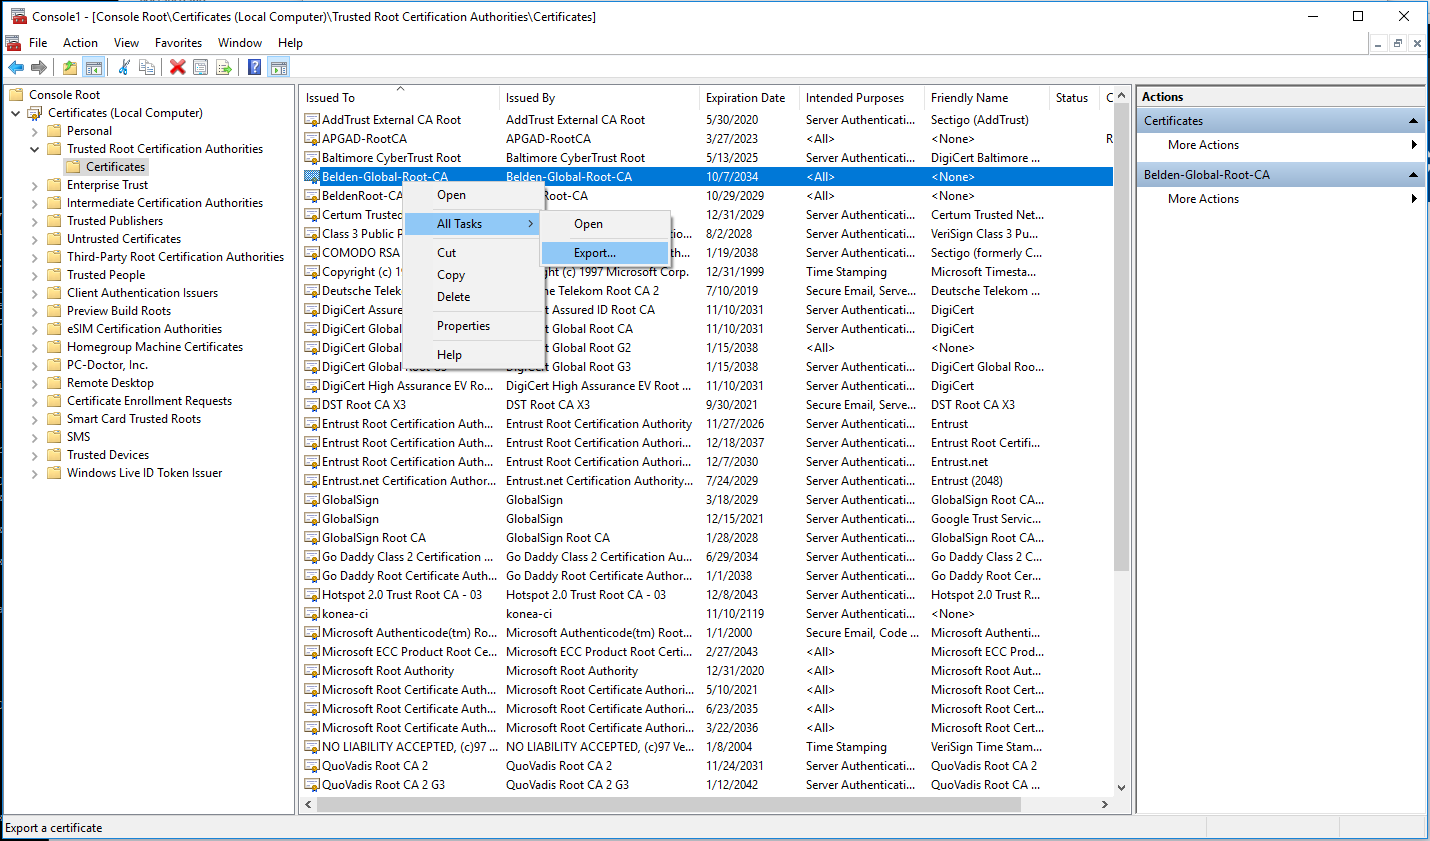
1. open the Microsoft Management Console - Window-key+R and type mmc
2. Select File - Add/Remove Snap-in (CRTL+M) and add 'Certificates' for Computer account
3. Select Certificates (Local Computer) - Trusted Root Certification Authorities - Certificates from the tree structure
4. Highlight the Root-CA certificate and select All Tasks - Export from the context menu (right click)
5. In the certificate export wizard select Base-64 encoded X.509 (.CER) format to export in file.
Authentication List

Change the authentication list policies to LDAP.
For testing put LDAP in second until you verified your configuration works.
LDAP configuration
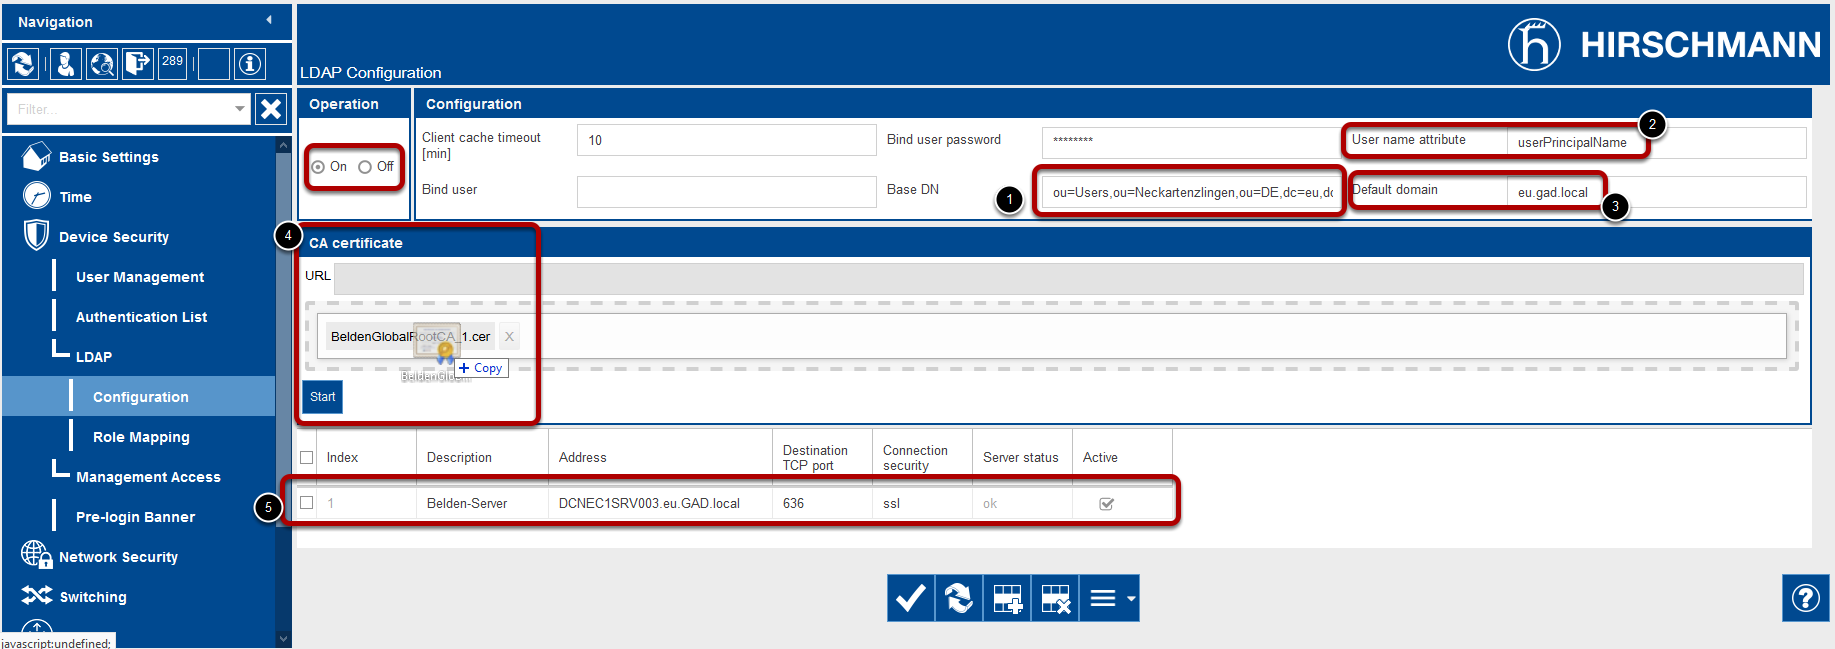
Operation: On
Configuration:
- Base DN
- User Name Attribute
- Default domain
- CA Certificate: Upload the server certificate if you use ssl or TLS
- Specify the AD server, port number (usually 389 or 636). In this example we use a server name due to the used certificate. Make sure that you enable DNS client as well (see next step).
Enable DNS Client
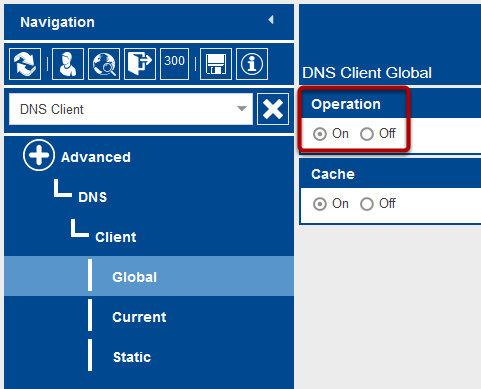
Enable the DNS-Client
Role Mapping
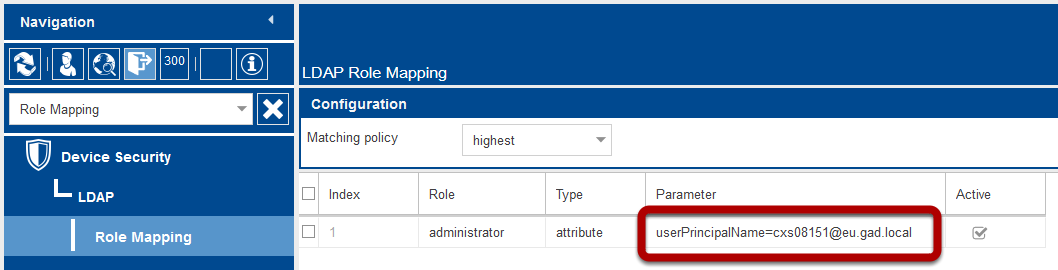
Create a new role mapping.
Selectable roles are unauthorized, guest, auditor, operator and administrator
Map these roles to AD attribute or groups.
 Deutsch